Using the Wallet Daemon
The Enjin Wallet Daemon provides a streamlined process for signing blockchain transactions, enabling seamless and efficient transactions between your game and the blockchain. This tool creates a persistent bridge between your game and the blockchain, ensuring a fluid gaming experience for players.
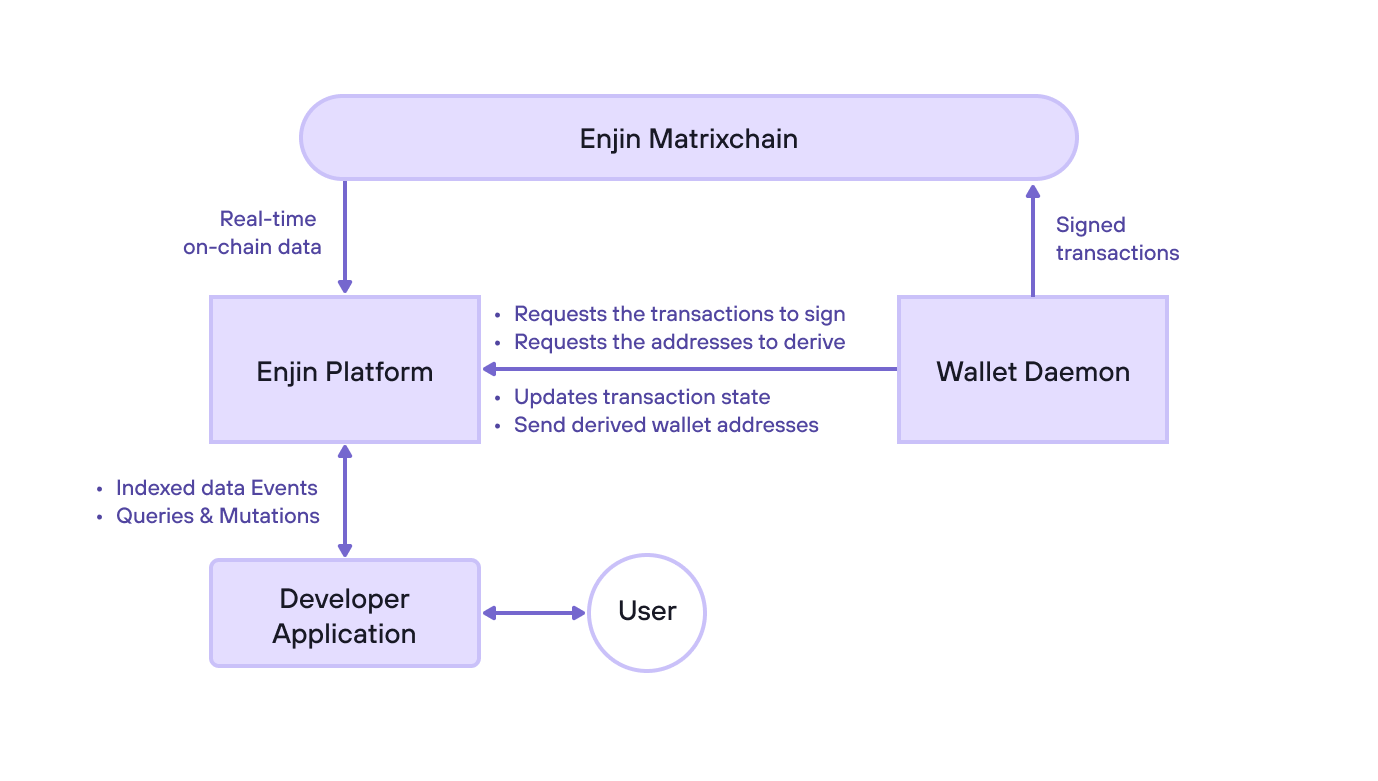
In the Enjin Platform context, the Wallet Daemon is a utility tool that manages a blockchain wallet address associated with an Enjin Blockchain account. When a transaction is initiated on the Enjin Platform, the Wallet Daemon receives the transaction, signs it, and sends it back to the platform. This ensures secure and efficient transaction processing for Enjin Platform users.

The diagram above provides insight into the interaction between the Enjin Wallet Daemon and the Enjin Platform. This illustrates how the Wallet Daemon can communicate with the API in both directions, automatically signing and broadcasting transactions to the blockchain. This helps developers better understand how the two components work together seamlessly to provide a streamlined experience.
Wallet Daemon Events

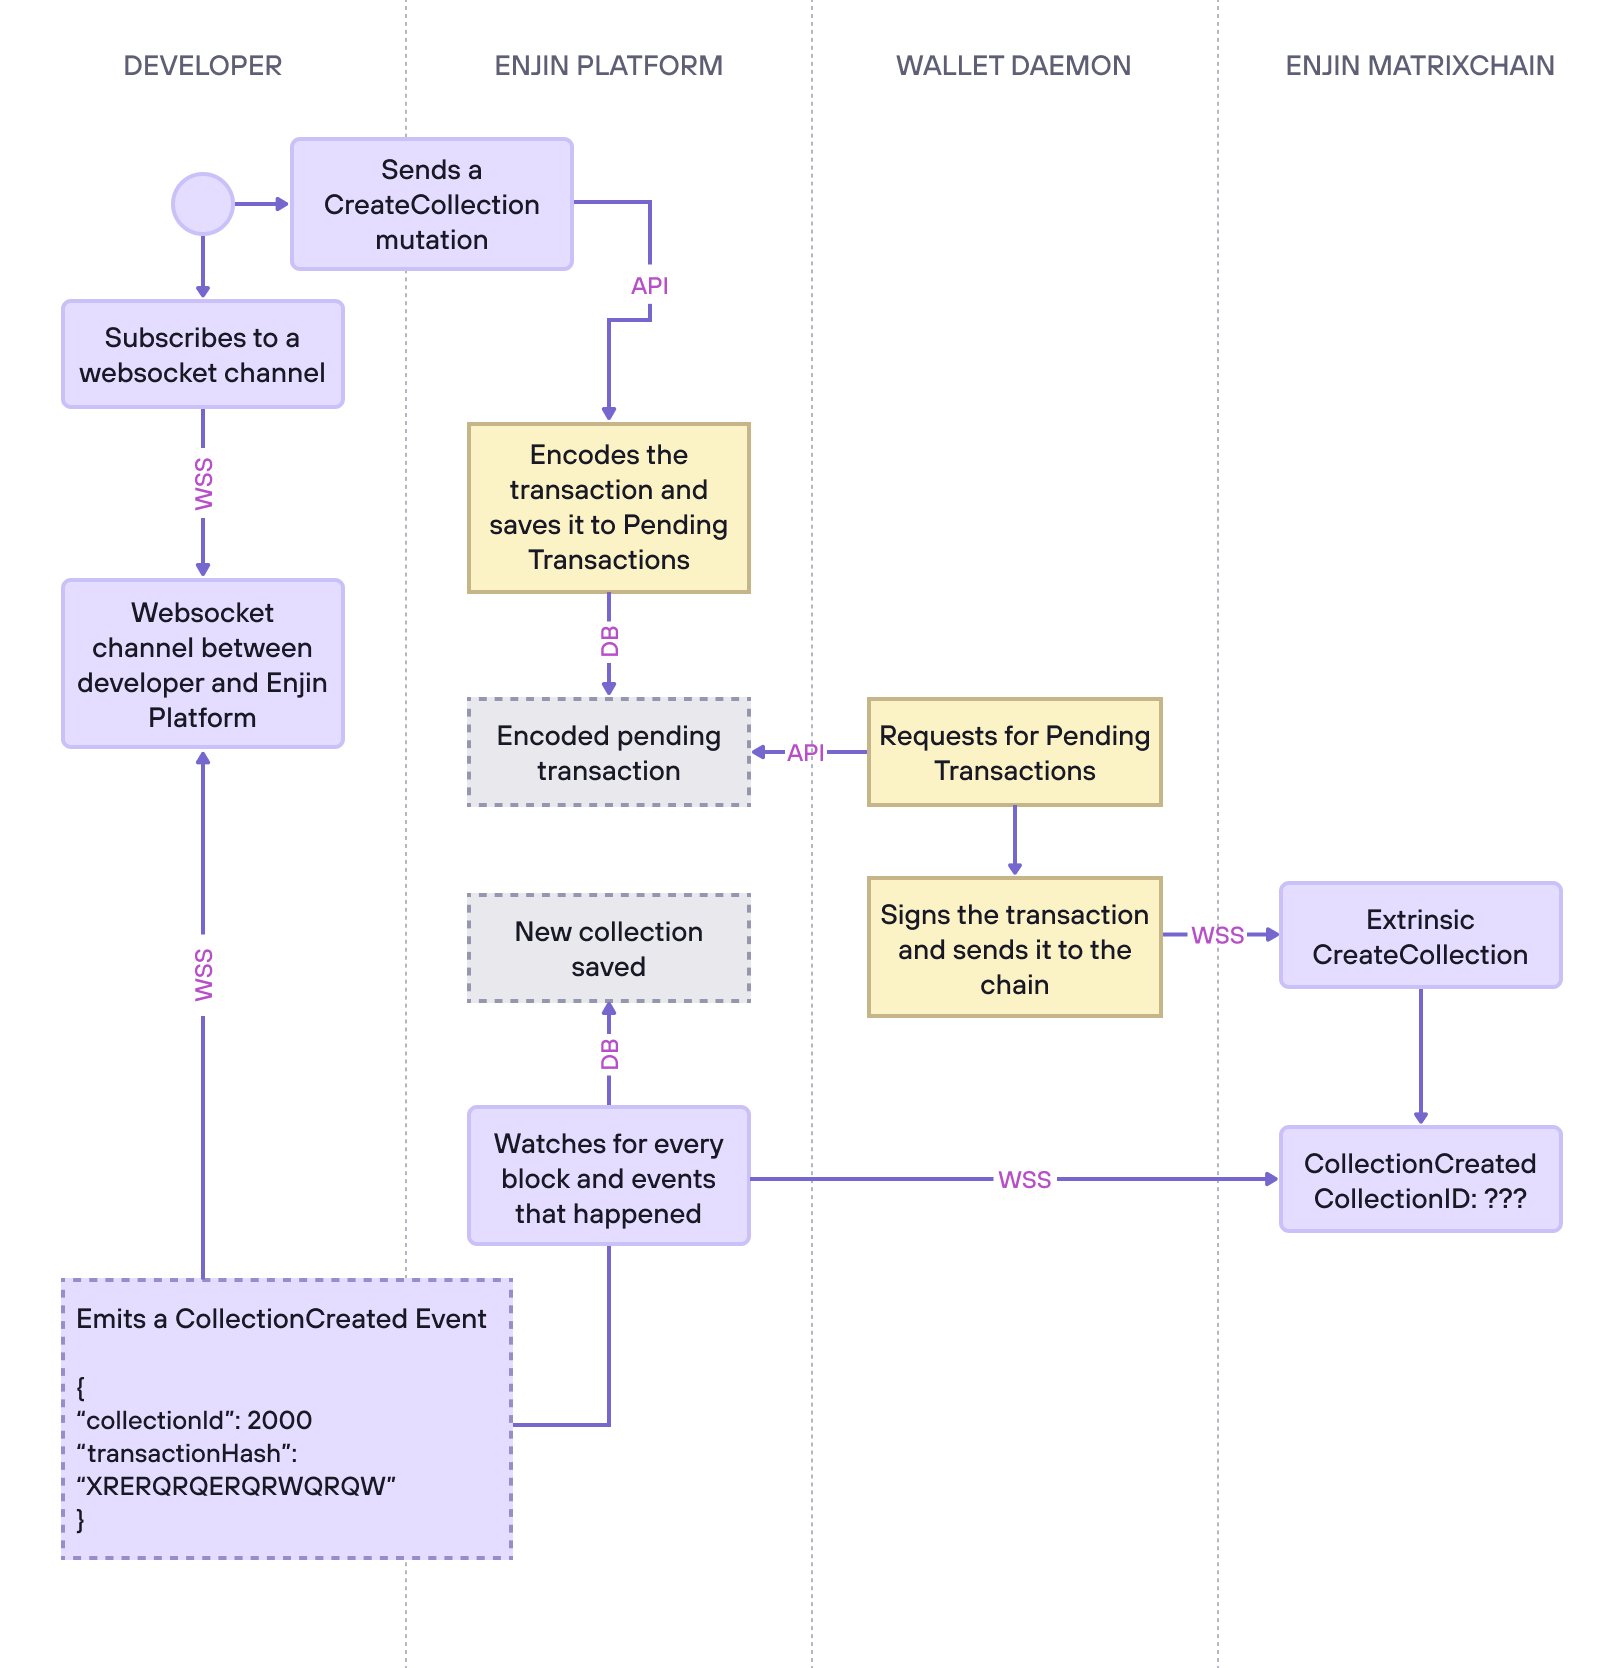
The diagram above depicts the various stages involved in creating a new collection on the Enjin Matrixchain via the Enjin Platform API, with a particular emphasis on the Wallet Daemon events.
- Establish a WebSocket connection - Connect to a WebSocket server to subscribe to channels that receive events.
- Subscribe to a WebSocket channel - Subscribe to the channel associated with your wallet to receive real-time events.
- Send a mutation - Send a "CreateCollection" mutation to the Enjin Platform API to create a new collection on the Enjin Matrixchain. The API will encode the transaction that the wallet daemon needs to sign and save it in the Enjin Platform Database.
- Wallet daemon requests pending transactions - The wallet daemon repeatedly asks the Enjin Platform API if there are any transactions to sign to prevent incoming connections to the wallet daemon, which holds your Private Key.
- Sign and broadcast the transaction - After receiving the pending transaction, the wallet daemon signs it with your private key and broadcasts it to the Enjin Matrixchain.
- Enjin Matrixchain processes the transaction - If everything is correct and valid, the Matrixchain successfully processes the extrinsic sent by the wallet daemon, and the new collection is created.
- Enjin Platform API monitors the chain - The Enjin Platform API continually watches the chain via a WebSocket connection to detect any activity.
- Save the data to the database - The Enjin Platform API stores the new collection data in its own database, allowing you to query it as desired.
- Emit an event - The Enjin Platform API sends an event to the WebSocket channels, providing you with the opportunity to take appropriate actions if you're subscribed to the relevant channel.
- Using the Wallet Daemon Executable.
- Setting up Wallet Daemon via Docker.
There are two ways to run the Wallet Daemon, each suitable for different user profiles and use cases:
- Executable Approach: This method involves running a simple executable, configuring it via a user interface, and clicking 'Run' to start it. It is the most straightforward approach and is recommended for beginners or those who are not developers and for development environments / personal use. Learn how to set it up in our Setting up Wallet Daemon using Executable guide.
- Docker Approach: This method involves cloning a GitHub repository and modifying the configuration files. It offers more flexibility and control, making it suitable for developers and for production use. Learn how to set it up in our Setting up Wallet Daemon using Docker guide.
Choose the approach that best fits your technical proficiency and the needs of your project.
Wallet Daemon Executable

Setting up the Wallet Daemon Executable is a straight forward process.
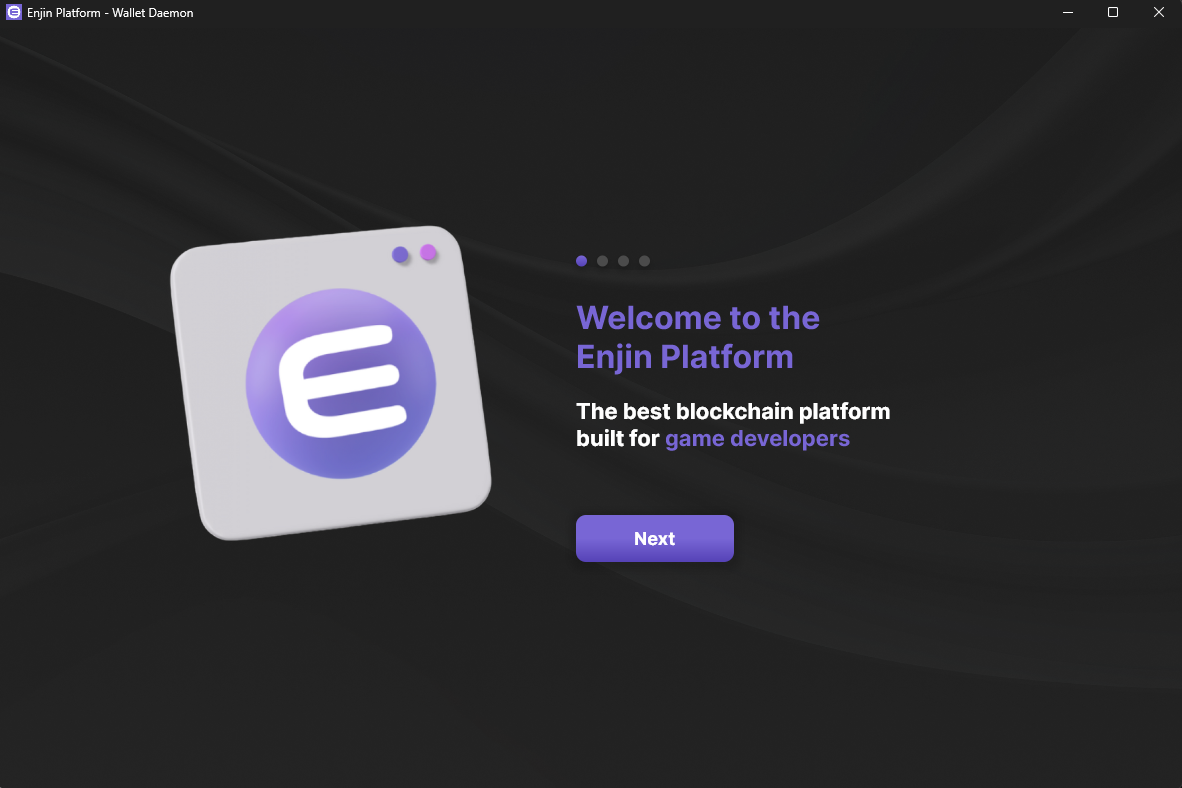
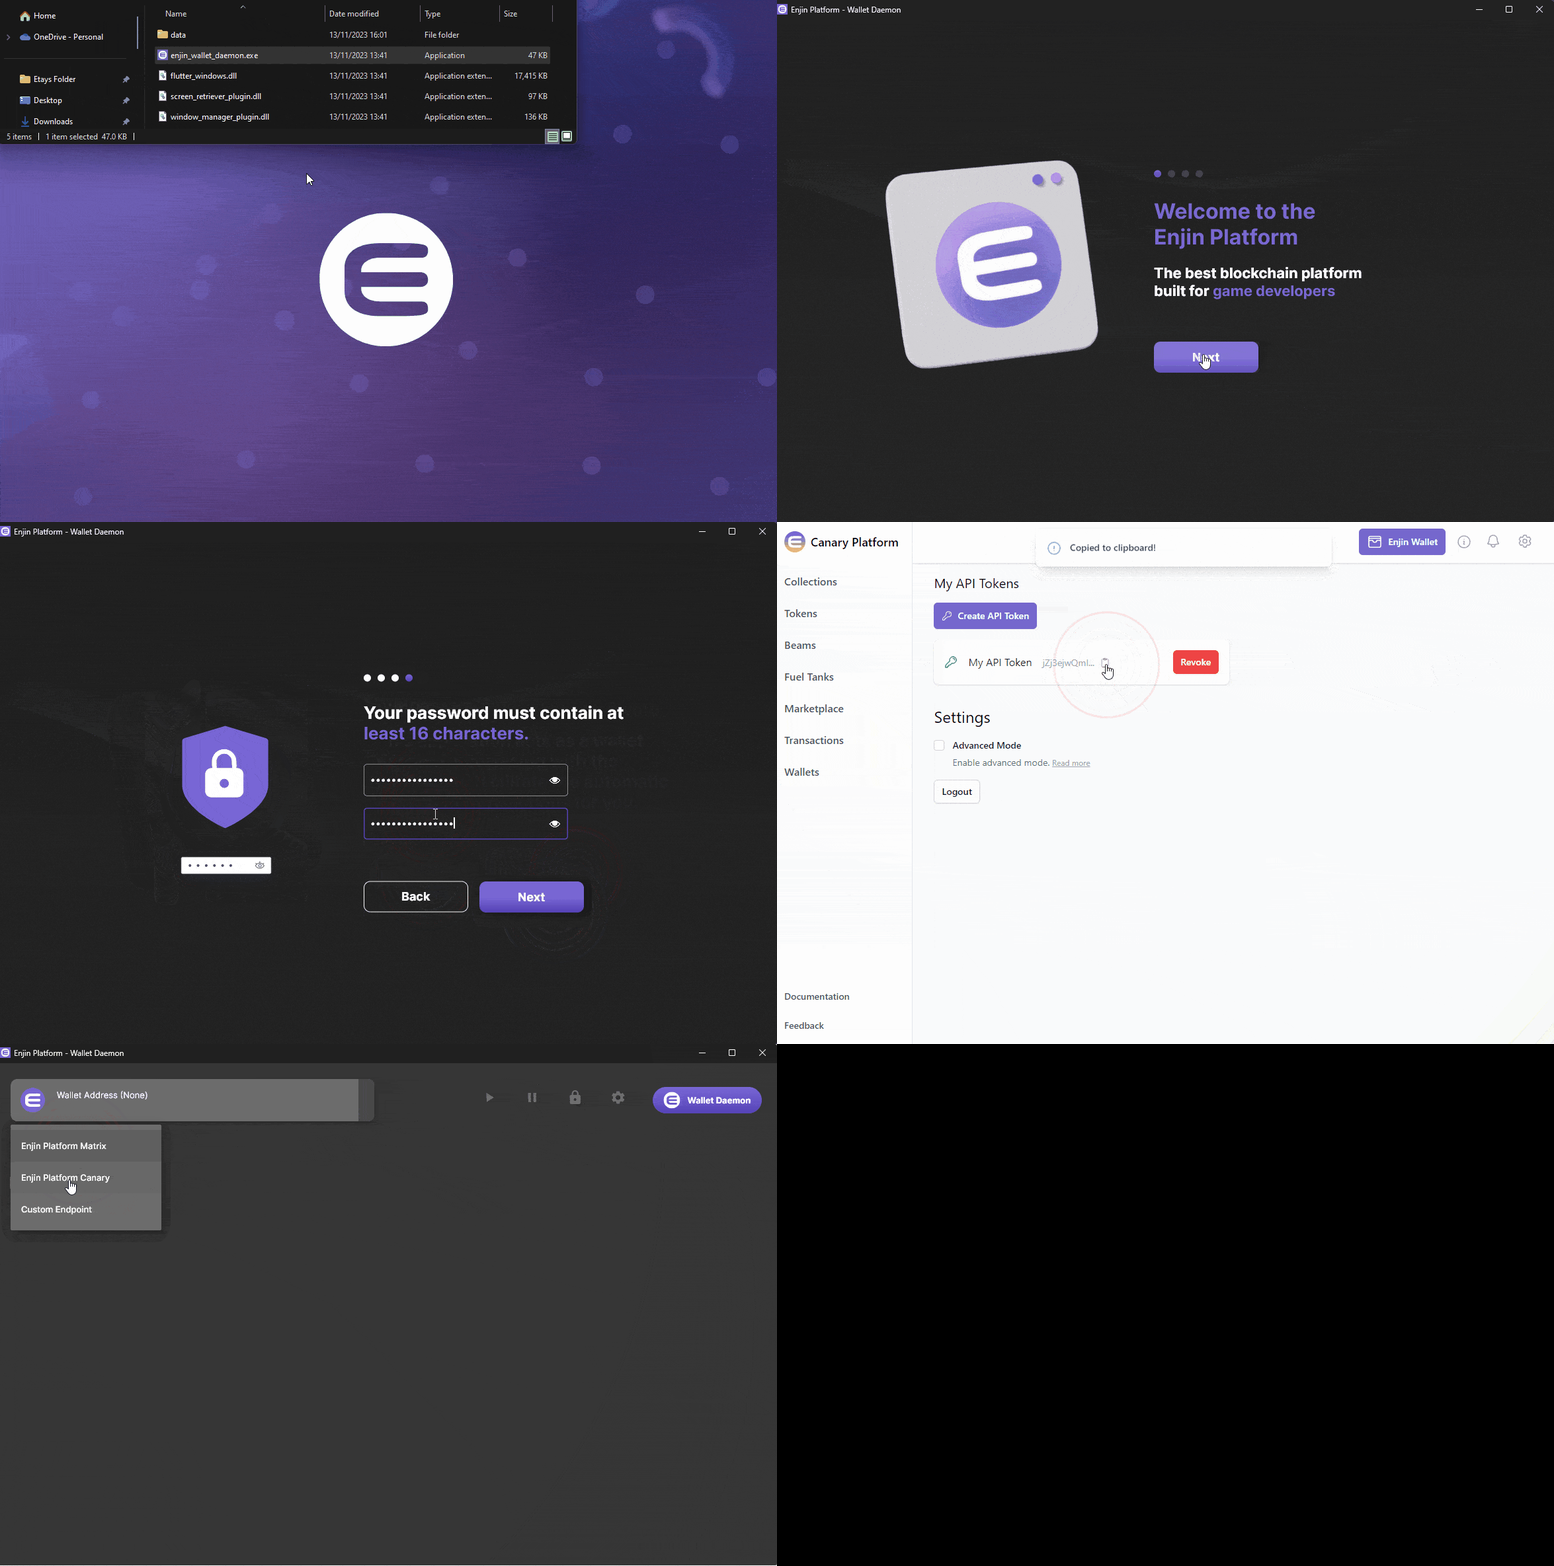
Download the latest version of the Wallet Daemon from GitHub, extract it, and run the enjin_wallet_daemon.exe executable file.
Follow the on-screen instructions to set it up and make sure to insert your Enjin Platform API Token from your account settings page.

Setting up Wallet Daemon via Docker
The code repository can be found at https://github.com/enjin/wallet-daemon/
It is recommended that the Enjin Wallet Daemon is installed and ran in isolation. This means running it on a dedicated server. The daemon itself is incredibly light-weight and does not require any extensive resources.
If you don't have Docker installed, you may install either the docker engine or docker desktop, though if you have never used docker before we recommend using docker desktop: https://www.docker.com/products/docker-desktop
To ensure uninterrupted service and transaction signing capabilities, users must upgrade their Wallet Daemon to v2.1.1 or greater before the Sentosa blockchain upgrade.
Canary Testnet: The Sentosa upgrade is already live (since October 27, 2025). If you are using the Canary Wallet Daemon to sign transactions, you must update immediately to v2.1.1+ or transactions will fail.
Mainnet: The upgrade is scheduled for December 8, 2025 (approx. 16:30 UTC, at Relaychain block 13229687 and Matrixchain block 7734855). While older versions will work until this date, it is highly recommended to upgrade to the latest version beforehand.
Instructions on upgrading the wallet-daemon to the latest version can be found here
To download the Enjin Daemon, clone the enjin/wallet-daemon repository from GitHub by running this command in the Terminal:
git clone https://github.com/enjin/wallet-daemon.git
Configure Daemon
You will want to update the .env file with the PLATFORM_KEY (which is an API Token generated within the Settings page of the Enjin Platform Cloud). In addition to this, you'll want to specify a unique KEY_PASS.
The KEY_PASS is immutable. It is directly used to derive the wallet private key. Choose something unique and make sure to backup this KEY_PASS in a secure manner.
The final configuration is to update the config.json file to communicate with either the Enjin Blockchain (mainnet) or Canary Blockchain (testnet). You can do this by updating the node property in the JSON file. You can find an example of both networks below.
- Enjin Blockchain
- Canary Blockchain
{
  "node": "wss://rpc.matrix.blockchain.enjin.io:443",
  "relay_node": "wss://rpc.relay.blockchain.enjin.io:443",
  "api": "https://platform.enjin.io/graphql",
  "master_key": "store"
}
{
  "node": "wss://rpc.matrix.canary.enjin.io:443",
  "relay_node": "wss://rpc.relay.canary.enjin.io:443",
  "api": "https://platform.canary.enjin.io/graphql",
  "master_key": "store"
}
Starting the Daemon
Finally, you can spin up the daemon using the following command from your local wallet-daemon directory:
docker compose up -d daemon
On the initial launch, a 12-words mnemonic seed will be created in the /store folder, with an additional encryption using the secret pass provided in the KEY_PASS environment variable. If you ever need to import this wallet into any wallet app, the derivation path is as follows:
<the-12-words-mnemonic-seed>///<the_key_pass>
Updating the Daemon to the latest version
To upgrade your Docker installation of the Wallet Daemon to the latest version, follow these steps from within your local wallet-daemon directory:
- Pull the latest code from the repository:
git pull - Stop the currently running container:
docker compose stop daemon - Rebuild the Docker image to incorporate the updates:
docker compose build --no-cache - Start the daemon again:
docker compose up -d daemon
Importing Wallet Daemon From Existing Seed
Wallet Daemon may be encrypted with a password specified in the KEY_PASS env var located in the .env file.
If your existing wallet is encrypted with a password, make sure to update your KEY_PASS var accordingly.
If your existing wallet is not encrypted, leave the KEY_PASS var empty.
Follow the steps below to set up your wallet daemon from an existing seed:
- Find your wallet's public key. You can convert your wallet's account address to it's public key with the Account Format Transform tool.
We'll use wallet address
efRP7f5aFWWobNiNxcWGNxhY1RdRXZ4kScvwuFdD4bsBHEUZWas an example. It's public key is0x62c75d8f81e05794cd0b703cf07b7ea3196840eaac4e300cb968fdd266882e02. - Remove the 0x from the public key from step #1.
For our example, it's
62c75d8f81e05794cd0b703cf07b7ea3196840eaac4e300cb968fdd266882e02 - Inside your local
wallet-daemon/storefolder, create a file with the name73723235<string from step #2>. For our example, we've created the file/store/7372323562c75d8f81e05794cd0b703cf07b7ea3196840eaac4e300cb968fdd266882e02 - Inside the new file created on step #3, insert your wallet's mnemonic seed wrapped with double quotes.
Example:
"earn meat maid rotate ..." - Rebuild your docker container for the changes to take effect:
docker compose build - Run the daemon again:
docker compose up daemon