Using WalletConnect
Learn how to send transaction request to user's wallet using WalletConnect
WalletConnect is an open-source protocol that connects your mobile wallet to decentralized applications.
Using the Platform API and WalletConnect you can send any transaction request directly to your user's wallet app.
What you'll need:
- Node.js 18+ and yarn installed
- A mobile device with Enjin Wallet app installed
- A Canary wallet with at least 6.5 ENJ in it to cover for Storage Deposit and Transaction Fees.
You can obtain cENJ for testing from the Canary faucet.- An Enjin Platform Account (Canary).
Install and configure the sample project
On production apps, you will need WalletConnect's SDK, but for this guide we'll be using a sample project called polkadot-onboard.
Start by cloning the polkadot-onboard repository: https://github.com/enjin-forks/polkadot-onboard.git
Once cloned, install the packages, install the workspace, build the workspace, and start the example project.
To do that, navigate to the cloned repository folder and run the following commands:
yarn
yarn install:workspace
yarn build:workspace
Now, let's run the project and test it. You can do that by running the following command inside the root folder of the project:
yarn start:react-next
Navigate to http://localhost:3000 using your browser. If everything went well, a sample page should load up.
Connect user's wallet
To send transactions to your user, he must be connected to your dapp.
Clicking Get Wallets, followed by Polkadot Demo 2.0, initiates a connection between your user and your dapp.

Once the user scans the QR code with his Enjin wallet app (or any other wallet with WalletConnect & Enjin Blockchain support) he will be asked to approve the connection:
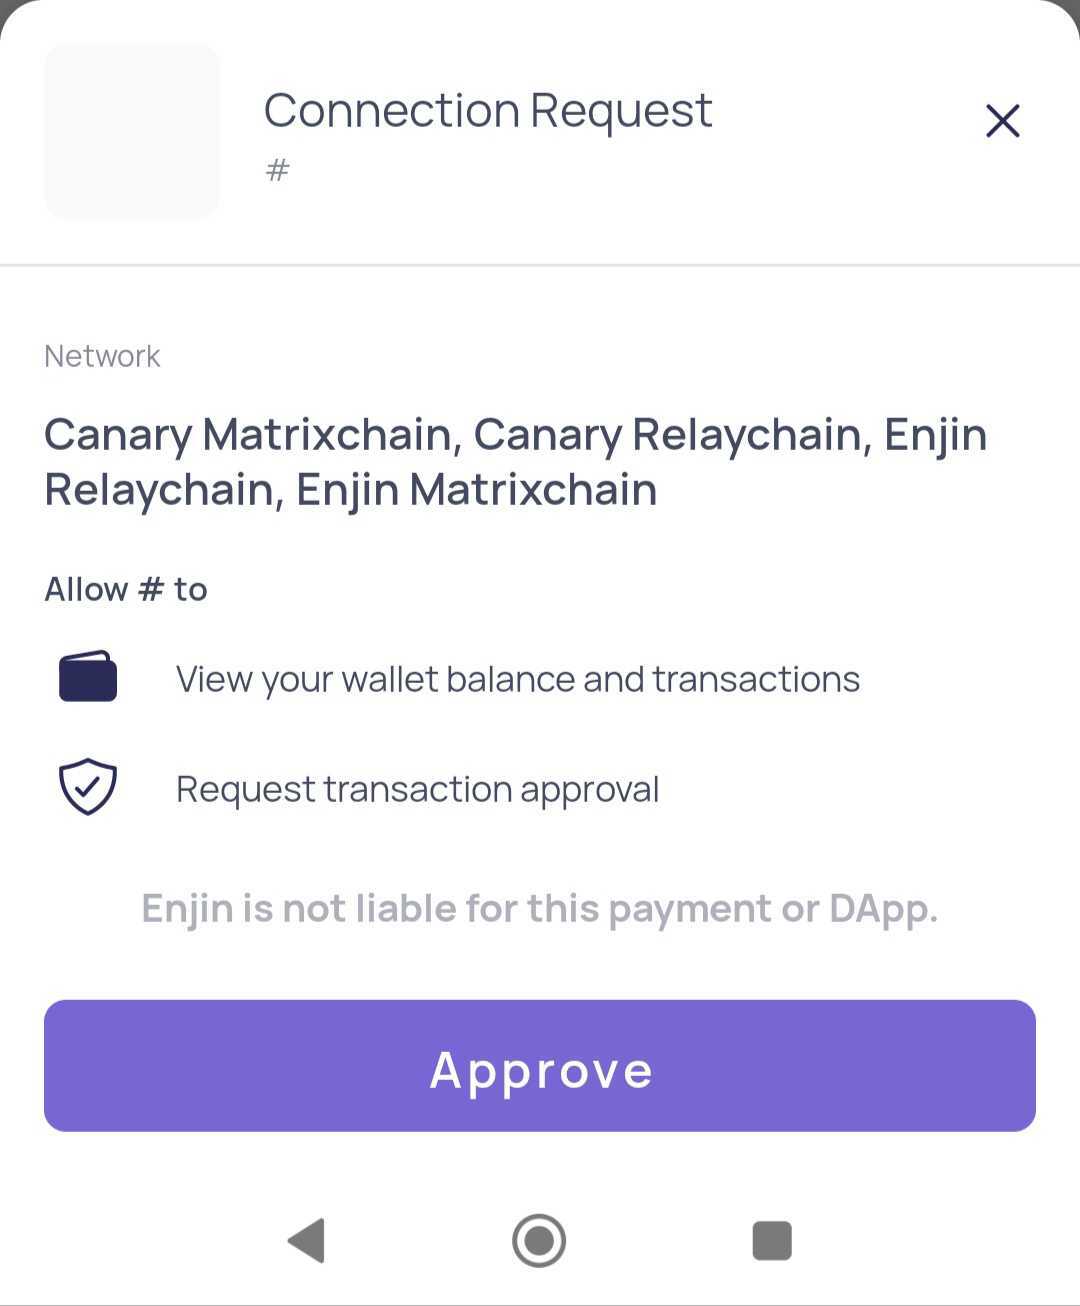
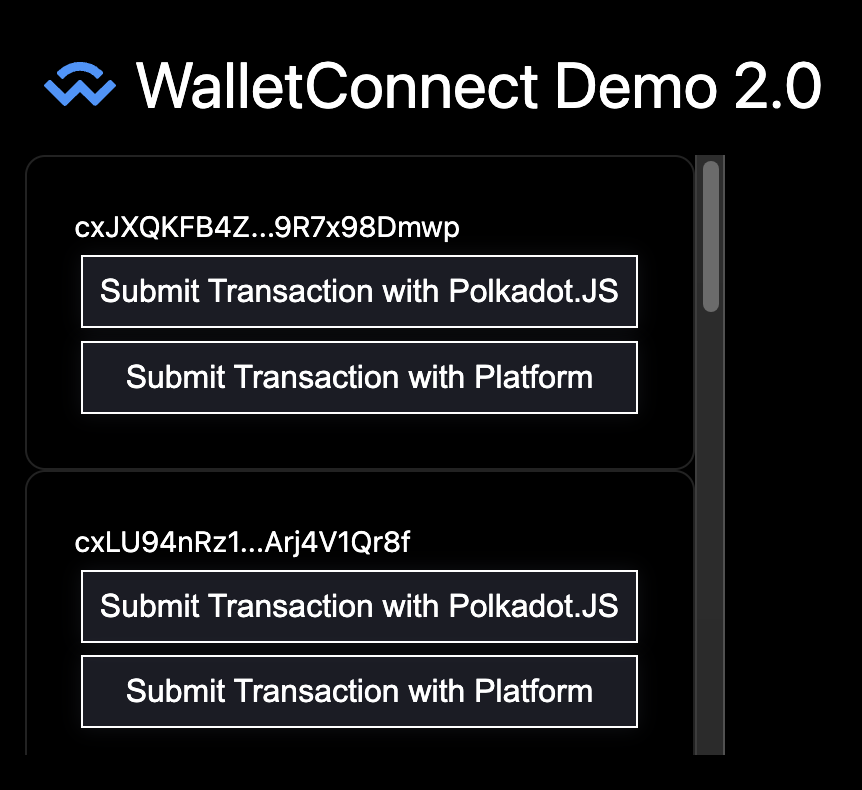
Once a connection was made, you'll receive a list of all addresses connected from your user's wallet.
Now you are able to send any transaction request to your user's wallet.
To demonstrate a sample transaction request, click the "Submit Transaction with Polkadot.JS" button on one of the displayed addresses.
A Transaction Request dialog will pop up on user's connected wallet app, asking for approval.
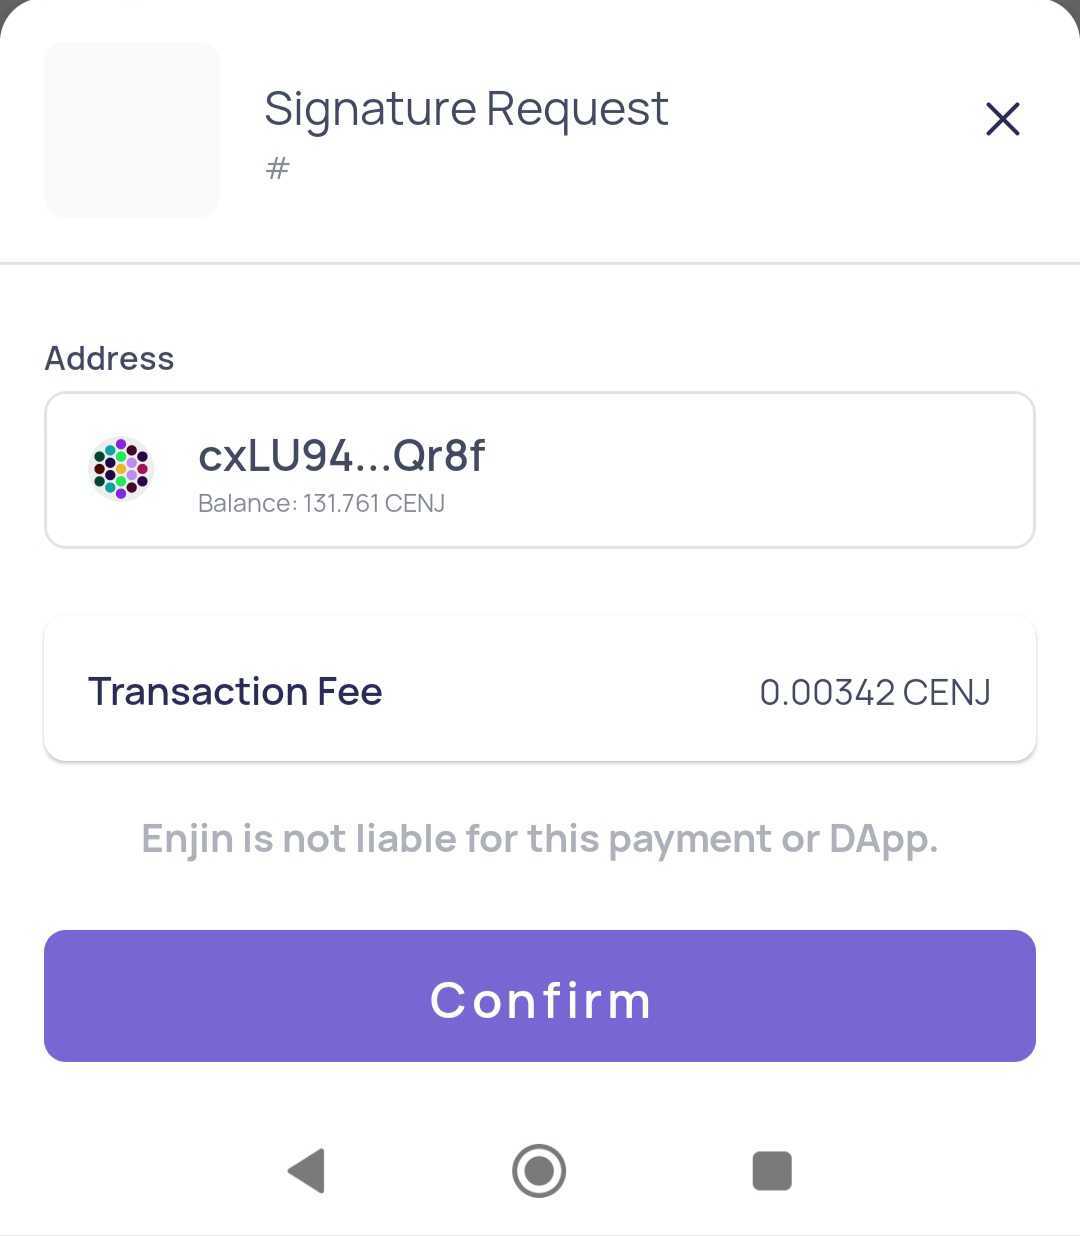
Once the transaction request is confirmed by the user, his wallet will sign and broadcast a message saying "I am signing this transaction!".
In the next section, you'll learn how to construct your own transaction requests using Enjin Platform API
How to construct a custom transaction?
In the example above, we have sent a request to broadcast a transaction that was already constructed for us.
But how was that transaction constructed and how can we send any transaction we want? Let's find out!
At examples/react-next/pages/api, there's two endpoints we'll be using:
transaction.tsxendpoint which constructs the transactionsend.tsxwhich broadcasts the transaction request to the blockchain using Enjin Platform API.
First, we need to insert our Enjin platform API key to be able to interact with it.
If you haven't created an api key yet, you can do so in https://platform.canary.enjin.io/settings.
In both examples/react-next/pages/api/transaction.tsx and examples/react-next/pages/api/send.tsx files, replace your-api-key with your api key (note, there's three different api key fields that needs to be updated).
Once we've configured the Enjin Platform API key and are authenticated, we can go ahead and press the "Submit Transaction with Platform" button.
A CreateCollection request will be sent to your wallet, and once confirmed, the transaction will be signed and broadcasted to the blockchain.
Now it's time to break it down and understand how it works:
Step #1: Constructing the transaction call
We are constructing the transaction using the transaction.tsx endpoint.
First, we make a query to the user's address to get its nonce:
  const walletResponse = await fetch('https://platform.canary.enjin.io/graphql', {
    method: 'POST',
    mode: 'no-cors',
    headers: {
      'Content-Type': 'application/json',
      'Authorization': 'my-auth-key',
    },
    body: JSON.stringify({
      query: `query GetWallet($account: String!) {
        GetWallet(account: $account) {
            nonce
        }
    }`,
      variables: {
        account: req.query.address
      }
    })
  });
Once we get the nonce, we prepare the CreateCollection transaction call using Enjin Platform API.
You can use any other mutation Enjin Platform API offers, but for this example we're using CreateCollection.
  const response = await fetch('https://platform.canary.enjin.io/graphql', {
    method: 'POST',
    mode: 'no-cors',
    headers: {
      'Content-Type': 'application/json',
      'Authorization': 'my-auth-key',
    },
    body: JSON.stringify({
      query: `mutation CreateCollection($nonce: Int!, $signingAccount: String!) {
        CreateCollection(
            mintPolicy: { forceSingleMint: false },
            signingAccount: $signingAccount
        ) {
            id
            signingPayloadJson(nonce: $nonce)
        }
    }`,
      variables: {
        signingAccount: req.query.address,
        nonce: nonce
      }
    })
  });
We are also passing the signingAccount. This is necessary so your daemon doesn't sign the transaction.
In the mutation response, we're asking for the id and signingPayloadJson, which we will use in the next step.
Step #2: Sending the Transaction Request to user's wallet
With the payload in hand we pass that to our WalletConnect signer and ask it to sign. In the example project, this is done at: examples/react-next/components/AccountBox.tsx
const txId = data?.data?.CreateCollection?.id;
const payload = data?.data?.CreateCollection?.signingPayloadJson;
const { signature } = await signer?.signPayload(payload)
The above will trigger the Transaction Request dialog you saw previously, asking for the user to confirm signing the transaction.
Step #3: Broadcasting the signed transaction
Finally, we received the txId, signature, and payload from the user's wallet.
We can now broadcast the signed transaction to the blockchain using the Enjin Platform API SendTransaction mutation.
This is done at: examples/react-next/pages/api/send.tsx
  const response = await fetch('https://platform.canary.enjin.io/graphql', {
    method: 'POST',
    mode: 'no-cors',
    headers: {
      'Content-Type': 'application/json',
      'Authorization': 'my-auth-key',
    },
    body: JSON.stringify({
      query: `mutation SendTransaction($id: Int!, $signingPayloadJson: Object!, $signature: String!) {
        SendTransaction(id: $id, signingPayloadJson: $signingPayloadJson, signature: $signature)
    }`,
      variables: {
        id: Number.parseInt(req.query.id),
        signingPayloadJson: JSON.parse(req.query.signingPayloadJson),
        signature: req.query.signature
      }
    })
  });
The Enjin Platform will broadcast the transaction to the blockchain and keep track of it.
You can see the transaction status in Enjin Platform: https://platform.canary.enjin.io/transactions
Congratulations! you can now send any transaction request to your user's wallets.
Updated 11 days ago