Enjin Quick Start Guide
Welcome! This guide provides the essential steps to quickly integrate the Enjin Blockchain
and NFTs into your game or application using the Enjin Platform. We'll use the Canary testnet for a safe and free development environment.- Set up your developer account on the Canary Enjin Platform Cloud.
- Connected your developer wallet to authorize actions.
- Created your first blockchain Collection and NFT.
- Learned how to link your users' Enjin Wallets to your application.
- Sent a token to a linked user wallet.
- Read tokens from a linked user wallet
1. Create Your Enjin Canary Platform Account
What is the Enjin Platform?
The Enjin Platform is your central hub for managing blockchain projects, collections, and digital items (NFTs and Fungible Tokens). We'll start by creating an account on the Canary Platform, which operates on Enjin's testnet blockchain. This allows you to experiment without using real funds or affecting the main network.
Steps to Create an Account:
- Navigate to the Canary Platform website: https://platform.canary.enjin.io/
- Click on the "Create an account" button.
- Fill in your account credentials and click on the "Register" button.
- Verify your email address by clicking the link sent to your inbox.
- Log in to your newly created Canary Platform account.
2. Connect Your Wallet Account
Why Connect a Wallet?
To perform actions on the blockchain (like creating collections or minting tokens) through the Platform, you need to authorize these actions. Connecting your developer wallet (like the Enjin Wallet app) allows the Platform to request your signature for transactions you initiate.
Steps to Connect Your Wallet:
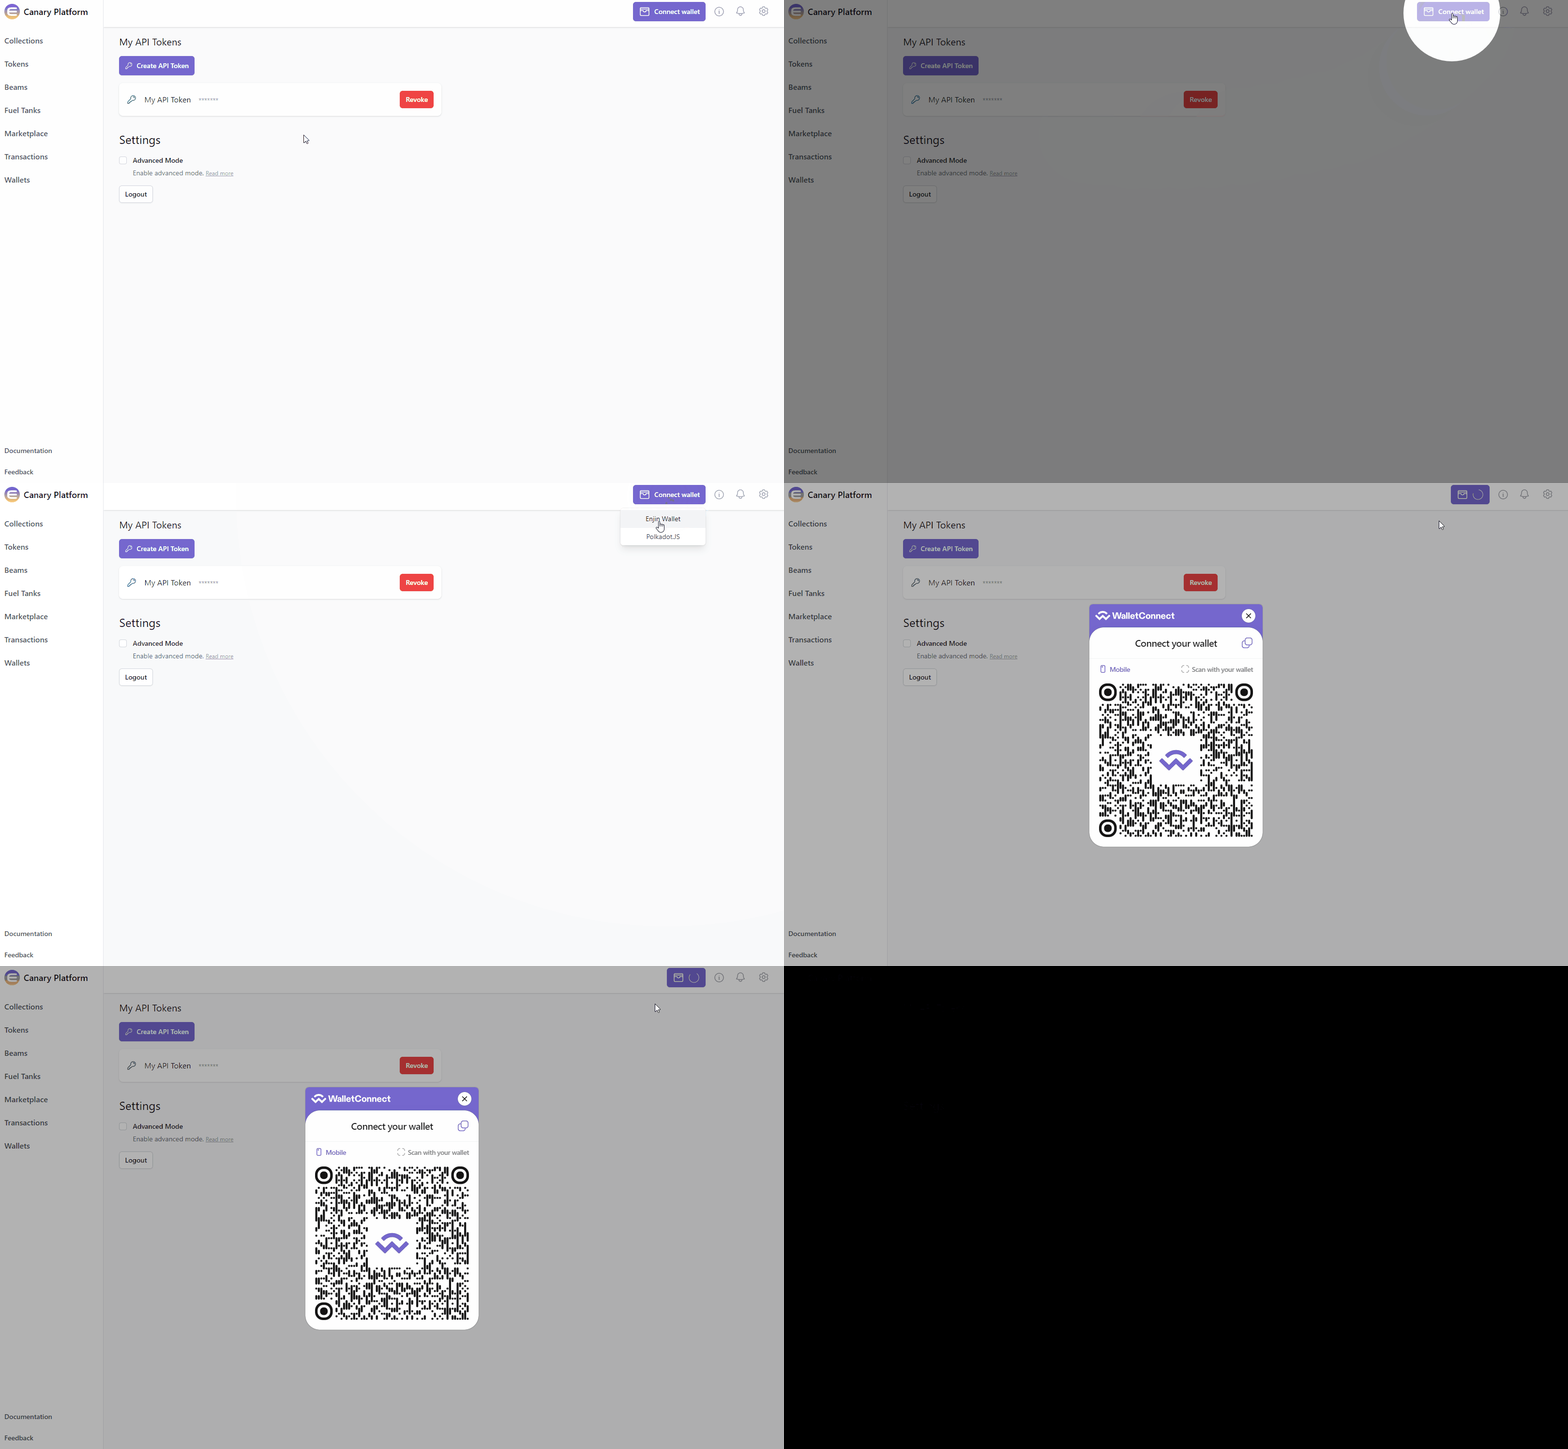
To connect your wallet, click on the "Connect Wallet" button in the top right corner and follow the on-screen instructions.

For applications requiring automated actions (like minting rewards in real-time or batch transferring items without manual confirmation each time), you can set up the Enjin Wallet Daemon. This secure service runs on your server and can automatically sign transaction requests sent to your Enjin Platform.
Learn More: Set up the Enjin Wallet Daemon
3. Create Your First Collection and Token
What are Collections and Tokens?
Let's define the core building blocks for your digital items on the Enjin Blockchain
:- Collection: Think of a Collection as a container or category for your digital items. It helps organize items related to your specific game, application, or a particular series. All items within a collection share certain base properties defined when you create the collection.
- Token (
multiToken): A Token represents the actual digital item that users can own within a Collection. On the Enjin Blockchain, all tokens fundamentally exist as MultiTokens. This is a core feature built directly into the blockchain protocol itself.
A common approach is to create:
- One Collection for your entire game or application.
- Multiple Tokens within that collection, representing the various items, characters, achievements, or currencies your users can own.
Steps for creating a collection and token:
You can interact with the Enjin Platform and initiate blockchain requests in several ways:
- Manually: Using the user interface of the Enjin Platform Cloud.
- Programmatically:
- Sending direct HTTP requests to the Enjin GraphQL API.
- Using the official Enjin SDKs:
- Other Languages: The Guides section provides code snippets for GraphQL, cURL, JavaScript, Node.JS, and Python for most operations.
- AI Assistant: Utilize the Enjin Platform AI assistant to help construct API calls.
- Create Collection:
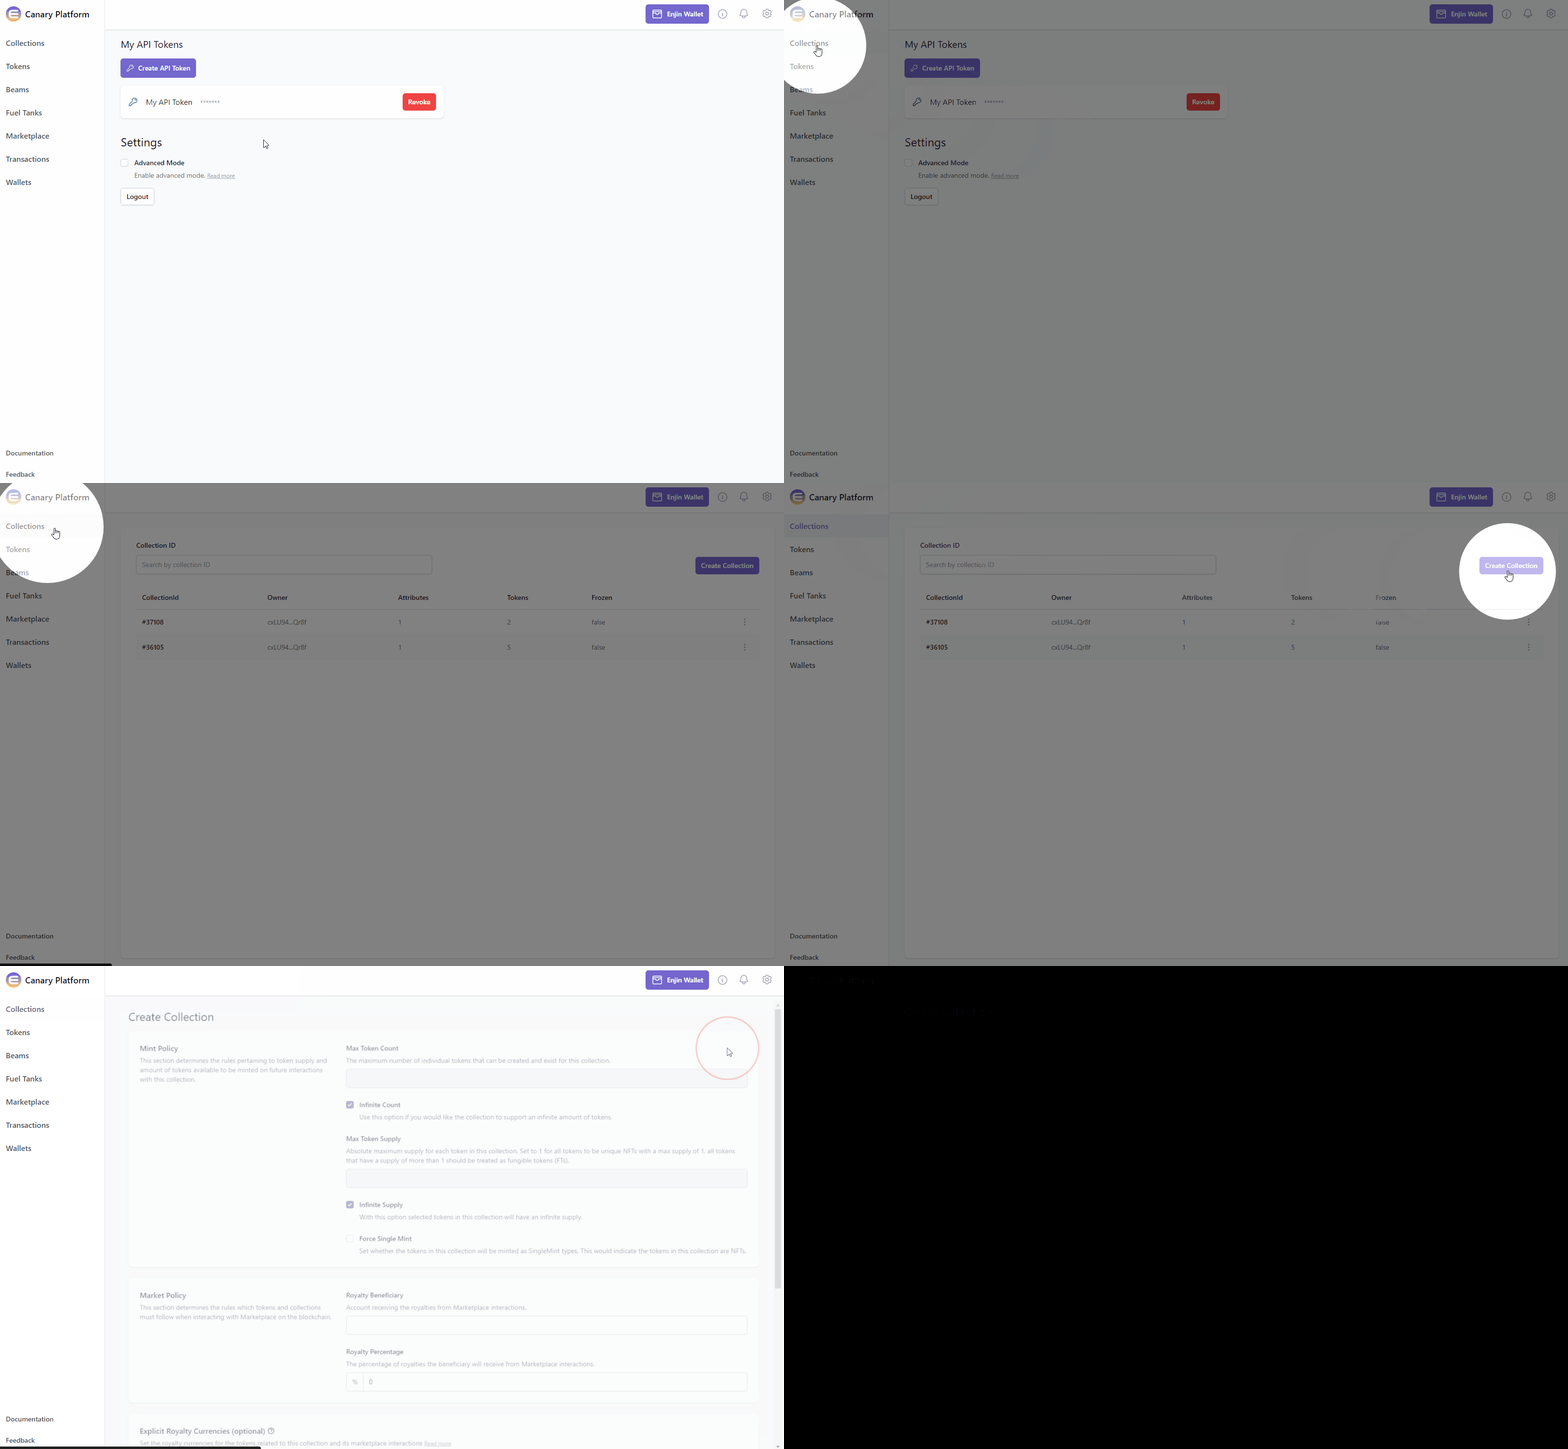
- In the Platform menu, navigate to the Collections page. Then, click on the "Create Collection" button.

- Customize your collection - you can specify the collection's name, description, media, attributes, Mint and Market policies, and more. To learn more about collection configuration, please check the Create Collections guide.
- Submit the creation request by clicking on the Create button. This will create a signature request which you can view in the Transactions page, and will require a transaction to be signed.
- To sign the Create Collection transaction request - Click on the "Sign" button and approve the signature request with your connected wallet.
- Once the transaction is confirmed on-chain, the new collection will appear in your Collections page, where you can also find its ID, keep note of it for the next step.
- In the Platform menu, navigate to the Collections page. Then, click on the "Create Collection" button.
- Create Token:
- In the Platform menu, navigate to the Tokens page. Then, click on the "Create Token" button.
- Customize your token - you can specify the token's name, description, media, attributes, and more. To learn more about token configuration, please check the Create Tokens guide.
- In the "Collection ID" input field, insert the collection id of the collection you just created. You may also click the input field and select the id from the dropdown menu.
- In the "Recipient" input field, insert the Address of the wallet that you wish to receive the token's initial supply. You can find the address of your connected wallet in the settings page by clicking on the Settings icon in the top right corner, followed by the "Settings" button.
- Submit the creation request by clicking on the Create button. This requires another transaction, which you can sign in the Transactions page.
You can also create collections and tokens using the API or SDKs.
➡️ See Guides:
4. Link a User's Wallet to Your Application
Why Link User Wallets?
To interact with a specific user's blockchain items (check their holdings, send them items), you need to know their public wallet address and have proof they control it. This process involves verifying the user's ownership of their wallet and then associating that verified wallet address with their account within your application's database. This association is what allows you to connect their in-app identity with their blockchain identity.
The typical flow for this is:
- Your application requests a unique wallet verification QR code from the Enjin API.
- Your application displays this QR code to the user.
- The user scans the QR code with their Enjin Wallet app.
- The wallet confirms ownership, securely providing your application with the user's public wallet address.
- Your application then saves this verified wallet address and associates it with the user's internal ID in your database.
Once this association (or "link") is established, you can:
- Grant in-game perks based on NFT ownership.
- Airdrop or transfer items directly to the user's associated wallet.
- Display their relevant blockchain inventory within your app.
Implementation (GraphQL Example):
To request a wallet verification code, we need to interact with the Enjin Platform API The Enjin Platform API is a GraphQL
API. If you are unfamiliar with GraphQL, we recommend checking out the How to Use GraphQL guide.In this example, we will be using the GraphiQL Playground
to easily send an API request from within the browser. In a production-ready integration, your app will typically send API calls using HTTP requests or one of the official Enjin SDKs. You can learn more about this in the Using the Enjin API page.To interact with the Enjin Platform API, head over to the Enjin Platform, click on the settings icon in the top right corner, followed by "platform-core" in the available packages. This will navigate to the Enjin Platform GraphiQL Playground.
Once you are in the GraphiQL playground page, copy & paste the following query:
query RequestAccount{
  RequestAccount{
    qrCode #Returns a QR code for your user to scan
    verificationId #An id to this account request call. Save this for next step
  }
}
This will return a link to a QR Code for you to display to your user, and a unique verification id to track the request. In your application, you'll display this QR code to your user and instruct them to scan it with their Enjin Wallet App
.To confirm that the user scanned the QR code and approved the request, copy & paste the following query (replace the replace_verification_id_here placeholder with the verificationId from the previous call's response):
query GetAccountVerified{
  GetAccountVerified(verificationId: "replace_verification_id_here"){
    verified
    account{
      publicKey
      address
    }
  }
}
If the user successfully scanned the QR code and approved the request, the response will show "verified": true and contain the user's wallet address:
{
  "data": {
    "GetAccountVerified": {
      "verified": true,
      "account": {
        "publicKey": "0x5a6aae294416f3e875d9a8975658905002cfd3e5e64105d76296c4b0adbfd77e", //The public key of the verified account
        "address": "cxLU94nRz1en6gHnXnYPyTdtcZZ9dqBasexvexjArj4V1Qr8f" //The address of the verified account
      }
    }
  }
}
At this point, your application should take the address value from the response and store it in your user database, associated with the specific user who scanned the QR code. This is the crucial step that "links" the user's in-app identity with their blockchain wallet address.
Check the full in-depth guide: Linking User Wallets.
5. Send a Token to a User
Why Send Tokens?
This is a core interaction – transferring an NFT from your project's wallet (or another source) to a user's linked wallet. This could be for:
- Rewarding achievements.
- In-app purchases.
- Airdrops or giveaways.
Implementation (GraphQL Example):
Sending tokens involves creating a transfer request via the API. You'll need the Token ID, the recipient's linked wallet address, and the amount (for Multi-Unit Token
s).Copy & paste the following mutation into the GraphiQL playground:
mutation TransferToken{
  SimpleTransferToken(
    collectionId: 36105 #Specify the collection ID here
    recipient: "cxLU94nRz1en6gHnXnYPyTdtcZZ9dqBasexvexjArj4V1Qr8f" #Specify the recipent address here
    params: {
      tokenId: {integer: 0} #Specify the token ID
      amount: 1 #Choose the transfer amount
    }
  ){
    id
    method
    state
  }
}
You can sign it in the Transactions page, as we did in the previous steps.
Check the full in-depth guide: Sending Tokens.
6. Reading Linked User's Tokens
Why Read User Tokens?
Once a user has linked their wallet (as shown in Step 4), you'll often need to check which tokens they own within your collection(s). This allows you to:
- Display their relevant inventory within your game or application interface (like in-game currency or an item).
- Verify ownership of specific NFTs to grant access, perks, or abilities.
- Trigger game logic based on the items they hold.
Implementation (GraphQL Example):
To read the user's wallet, copy & paste the following query into the GraphiQL playground, using the user's linked wallet address:
query FetchingWalletTokens{
  GetWallet(account: "cxLU94nRz1en6gHnXnYPyTdtcZZ9dqBasexvexjArj4V1Qr8f"){ #Specify the account address
    tokenAccounts{
      edges{
        node{
          balance
          token{
            tokenId
            collection{
              collectionId
            }
            attributes{
              key
              value
            }
          }
        }
      }
    }
  }
}
Check the full in-depth guide: Reading User Wallet Balances.
7. Next Steps and Advanced Features
Congratulations! You've covered the basics of setting up your project on the Enjin Platform, creating items, and enabling user wallet interactions.
Remember, this guide used the Canary testnet for development and testing. When you are ready to launch your application live, you will need to:
- Set up your project on the mainnet Enjin Platform Cloud: https://platform.enjin.io/
- Update your application's API calls or SDKs to use the mainnet GraphQL API endpoints
Now you can explore more advanced integrations:
- On-Demand Minting: Programmatically create new tokens directly into users' wallets based on real-time application events (e.g., crafting an item, completing a quest). This avoids pre-minting large supplies. ➡️ Learn about On-Demand Minting
- Enjin Wallet Daemon: If your application requires frequent, automated minting or transferring without manual intervention, setting up the Wallet Daemon is highly recommended for secure signature automation. ➡️ Set up the Enjin Wallet Daemon
- Managed Wallets: Simplify onboarding for users unfamiliar with crypto wallets. You can create and manage wallets for your users within the platform. Users can interact with blockchain features seamlessly, and later choose to export their items to their own self-custody Enjin Wallet if they wish. This significantly lowers the barrier to entry for Web2 users. ➡️ Explore Managed Wallets